

What if the most powerful art isn’t made from scratch, but discovered? A powerful artistic practice starts by seeing the ordinary in a new light. It’s about taking everyday items and giving them a new, profound purpose.
This approach is rooted in the concept of the objet trouvé, or “found object.” An artist takes a simple item from its normal use. They turn it into an art object filled with new meaning.
Pioneers like Meret Oppenheim were masters of this. She showed how a teacup could become something startling and symbolic. Her work unlocked the secret life hidden within mundane materials.
Today, this tradition lives on. Artists and creative thinkers assemble fragments and daily objects. They piece together shards of reality to build new narratives. The core theme is clear: creation can be a process of discovery and assembly.
You don’t always need a blank canvas. Sometimes, you just need to look at what’s already there. The hidden stories are waiting in the things we see every day.
From ready‑made to surreal object
Artists like Joseph Cornell didn’t just collect oddities; they orchestrated them. They used specific methods to create poetic narratives. This turns a simple found item—a ready-made—into a surreal object. A surreal object carries mystery, story, and new meaning.
The shift happens through intentional creative strategies. These strategies turn random fragments into a cohesive artistic statement. Think of the artist as a curator of meaning. They arrange, alter, and elevate everyday things.
Let’s explore the three core strategies that fuel this transformation.
Juxtaposition: Creating Dialogue Between Objects
Juxtaposition means placing two or more unrelated items side-by-side. This forces a new relationship. The artist’s main creative act is this placement. As seen in Robert Rauschenberg’s work, the act of placing and allowing tension or harmony to arise was the creative act.
Joseph Cornell mastered this in his shadow boxes. He placed vintage toys, maps, and glass bottles together. These combinations spark unexpected stories in the viewer’s mind. A seashell next to a clock suggests timeless travel. A bird cut-out near a cage implies freedom or confinement. The meaning emerges from the clash or harmony of parts.
Transformation: Altering Form and Function
Transformation physically changes an object. It bends, breaks, or rebuilds it into something new. This could mean drilling, painting, or combining fragments into a new whole. The “Encanto collection” is a good example. It transforms cultural fragments into a unified artistic statement.
A key tool for transformation is the armature. An armature is a hidden support structure. It holds and shapes disparate objects into a stable, new form. Think of it as the skeleton for your surreal object. Using wire, wood, or epoxy, artists build armatures to give their vision solid form. This moves the work from a loose pile of stuff to a deliberate sculpture.
Fetishization: Investing Objects with Symbolic Power
Fetishization endows an object with intense symbolic meaning. The object becomes a focus of ritual or personal significance. Its original use fades away. A worn doll’s head might become a totem of childhood. A rusted key might symbolize lost opportunities.
This strategy is about emotional charge. The artist treats the object with reverence. They present it in a way that asks the viewer to see its hidden aura. The object is no longer just a key or a doll. It is a vessel for memory, desire, or fear.
Together, these strategies—juxtaposition, transformation, and fetishization—provide a toolkit. They guide the artist in shifting materials from the mundane to the meaningful. The result is a surreal object that invites wonder and interpretation.
Techniques: drilling, pinning, epoxy, soft sculpture coverings
Assemblage turns ideas into real things through hands-on work like pinning and building armatures. This process makes your artwork strong and unique. Learning a few key methods helps make your pieces both expressive and lasting.
Drilling is the first step. It makes holes in wood, metal, or plastic. This lets you attach things with screws, bolts, or wires. Always start with a small pilot hole to avoid breaking the material.
Pinning uses thin metal pins or wire to hold things together. It’s great for temporary holds or for showing connections. It’s like sewing with metal.
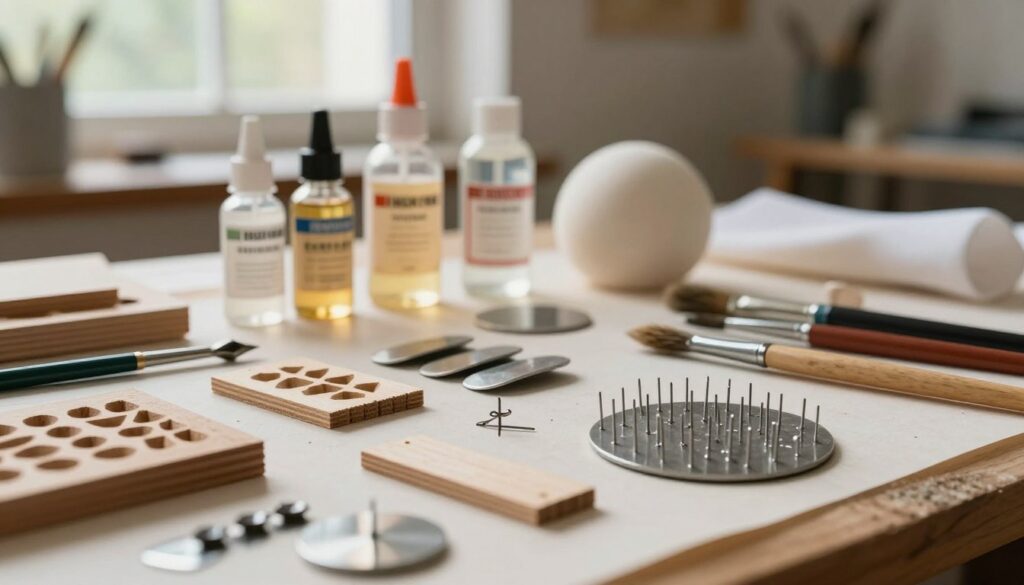
When screws aren’t enough, adhesives step in. Epoxy is a strong choice for bonding different materials. It’s made of two parts that you mix together. It sets hard and holds things together well.
Picking the right adhesive is key. Wood glue or white PVA work for porous materials. For flexible bonds, silicone is a good choice. Always test your adhesives on scrap first.
Soft sculpture coverings add texture and tie complex shapes together. You can use:
- Stretching fabric or leather over an armature.
- Building up layers of latex, papier-mâché, or resin-soaked cloth.
- Using batting and stitching to create padded forms.
These coverings can hide joins or add a soft, organic feel to shapes.
At the heart of these methods is the armature. This internal structure, made from wire, wood, or recycled parts, supports the whole piece. A good armature keeps heavy parts from sagging and gives soft coverings something to hold onto. It’s the hidden support that makes your assemblage last.
Using these techniques together—mechanical fastening, chemical bonding, and structural framing—lets you control your art fully. Your choice of how to join things tells a story of both strength and beauty.
Safety: tools, allergens, display stability
Safety in the studio is more than just avoiding sharp tools. When working with weathered trunks and mysterious objects, respect their unknown past and possible dangers. Keeping safe protects you and keeps the found material intact.
Start with personal protective equipment (PPE). This is a must when using tools like drills, saws, or sanders.
- Safety glasses protect your eyes from flying debris.
- Dust masks or respirators are key for sanding or cleaning old materials.
- Heavy-duty gloves keep your hands safe from sharp edges and harmful substances.
- Make sure your tools are in good shape and you know how to use them.
Every found object is a mystery. Before you start working on it, check for hidden dangers. Assume nothing is safe. Common dangers include:
Mold and mildew can hide in wood, paper, or fabric. Work in a well-ventilated area. Clean with a diluted vinegar solution while wearing gloves and a mask.
Lead paint is a big risk on items from before 1970. If you think it’s there, don’t sand it. Use a special primer or get a professional’s help.
Insect infestations can be in old wood or textiles. Look carefully and, if needed, freeze the object in a sealed bag for a few days to kill them.
When bonding, think about adhesives and solvents. Their chemicals need attention. Always read the safety data sheet (SDS) of the product.
Work in a well-ventilated area to avoid fumes. Many glues and solvents release harmful VOCs. Knowing your materials helps avoid headaches and other problems.
| Adhesive Type | Best For | Key Safety Note |
|---|---|---|
| Cyanoacrylate (Super Glue) | Small, non-porous bonds | Fumes can irritate eyes and lungs. Use sparingly with ventilation. |
| Two-Part Epoxy | Strong, durable joins on varied materials | Wear gloves; mixing components can cause skin sensitization. |
| PVA (White Glue) | Porous materials like paper, wood, fabric | Low toxicity but ensure area is ventilated during prolonged use. |
| Contact Cement | Large surface bonding (e.g., laminate) | Highly flammable. Use with extreme ventilation, away from sparks. |
Think about the artwork’s life after it’s made. Display stability is important for safety. A piece that’s not stable can fall and hurt someone or damage something.
Check the object’s center of gravity. For wall pieces, use hardware that can hold more than the artwork’s weight. For sculptures, make sure the base is wide and heavy to prevent it from tipping. Test it from different angles before it’s finished.
Lesson plan: theme, sourcing, ethics of found materials
Imagine starting your art project with a walk and a sharp eye. This is the essence of the “daily object challenge.” It teaches you to see the world as a treasure trove of materials. For both teachers and learners, a clear plan is essential to transform random finds into meaningful art.
This guide offers a step-by-step approach. It helps you choose a theme, find materials responsibly, and understand the ethics of using found objects. Let’s start building your project from scratch.
Crafting a Cohesive Theme
Before collecting anything, pick a theme. A good theme gives your project focus and depth. It turns random items into a story.
Themes like “memory,” “industry,” “childhood,” or “decay” can guide you. Artist Joseph Cornell used themes like astronomy and Victorian nostalgia in his shadow boxes. Your theme will shape what you look for and how you combine items.
Start simple. For example, a “texture” theme could lead you to collect rough bark, smooth sea glass, and brittle paper. A “journeys” theme might include maps, ticket stubs, and worn keys. Write down your theme. Let it guide your choices.
Responsible Sourcing Strategies
Where do you find materials? The world is full of them, but it’s important to source them responsibly. This respects the environment and communities.
- Nature Walks: Leaves, stones, feathers, and fallen branches. Always follow Leave No Trace principles. Take only what is abundant and already detached.
- Thrift Stores & Flea Markets: A treasure trove of discarded household items, broken toys, and old books. These are ethical sources as you are giving new life to purchased items.
- Urban Exploration: Neighborhood streets can yield interesting debris. Be cautious of private property and never take anything that appears to be part of a structure or someone’s personal belongings.
- Personal & Family Archives: Old letters, buttons, or tools from your own attic carry deep personal history. This is often the most ethically clear source.
Artists like Meret Oppenheim used everyday items—a cup, saucer, and spoon—and transformed them through unexpected material (fur) to create her iconic work. Your sourcing should be an active, curious process.

Found objects are not blank slates. They carry histories, energies, and sometimes cultural significance. Ethical practice honors this.
Consider the story of donated family trunks. The objects inside were not just “stuff”; they were memories and lineage. When using found materials, ask yourself these questions:
- Is it culturally sensitive? Avoid using sacred artifacts, ceremonial items, or objects from marginalized cultures unless you have a deep, respectful connection and understanding. This prevents appropriation.
- Is it legally obtained? Never take from private property, construction sites without permission, or protected natural areas.
- What is its narrative weight? Some objects, like a worn wedding ring or a child’s toy, hold heavy stories. Consider if your use respects or exploits that emotional weight.
- Can I honor its provenance? Sometimes, documenting an object’s origin—where you found it, what you believe its past to be—becomes part of the artwork’s label, adding layers of meaning.
Your goal is not just to use an object, but to engage in a dialogue with its past. This thoughtful approach elevates your work from craft to meaningful contemporary practice.
| Sourcing Location | Typical Finds | Ethical Priority | Creative Priority |
|---|---|---|---|
| Nature Walks | Driftwood, stones, seed pods, feathers | Environmental stewardship; take only what is abundant. | Organic forms and textures; connects work to the natural world. |
| Thrift Stores & Flea Markets | Vintage photos, utensils, clock parts, fabric | Supporting reuse economies; clear ownership transfer. | Nostalgia and historical juxtaposition; ready-made appeal. |
| Urban Exploration | Weathered posters, hardware, fragmented ceramics | Respecting public vs. private property; safety first. | Gritty, contemporary aesthetic; tells stories of urban decay and renewal. |
| Personal & Family Archives | Old jewelry, letters, tools, photographs | Personal connection and consent; understanding family legacy. | Deep autobiographical content; most intimate source material. |
By combining a clear theme, mindful sourcing, and a strong ethical compass, you lay a solid foundation for your assemblage project. This structured approach, inspired by the daily habits of artists and the lessons of masters like Joseph Cornell and Meret Oppenheim, ensures your creative work is both personally fulfilling and respectfully crafted. The best assemblages don’t just display objects; they honor their stories and activate new meanings.
Writing object‑poems and labels to activate meaning
Writing is a powerful tool for discovery. It lets artists uncover hidden messages in their objet trouvé creations. This process goes beyond just describing the work. It starts a deep conversation between the creator and their creation.
An object-poem is a short, evocative piece of writing. It comes from a physical assemblage. It doesn’t explain the work in a straightforward way. Instead, it hints at stories, emotions, or hidden connections.
This practice has a long history. It’s explored in pieces like the historical concept of object-poems.
An artist used AI to create a poem called “Reliquary of Time” for their assemblage. This act didn’t just label the work. It activated its meaning. The poem gave the artist new words and insights into their intentions.
How can you use this technique? Begin by spending quiet time with your finished piece. Write down the first words, textures, or memories it brings to mind. Avoid stating the obvious. Let your labels or poems pose questions or imply a story.
This writing acts as a bridge to your viewer. A cryptic line like “the whisper of a forgotten hinge” does more than a label saying “old metal piece.” It creates mystery and invites personal interpretation. The goal is to open the work up, not lock it down.
Ultimately, crafting text for your found object art turns writing into a tool for artistic discovery. It clarifies your intent and can reveal themes you didn’t consciously plan. This final, textual layer completes the journey of your objet trouvé, transforming it from a collection of items into a conversation.
Case studies and exhibition formats (shadow boxes, vitrines)
From Joseph Cornell’s intimate shadow boxes to sleek museum vitrines, the display format changes how we see art. It’s not just about showing art; it’s about telling a story. The way you present your art shapes the message you want to share.
Joseph Cornell is famous for his shadow boxes. These deep, glass-fronted boxes turn found objects into tiny worlds. Each box is like a private theater or a sacred relic, inviting a personal connection with the viewer.
Other artists have used different ways to show their work. Robert Rauschenberg mixed painting and sculpture in freestanding or wall-mounted pieces. For delicate or valuable art, the standard is the vitrine. A vitrine is a display case that protects the art and lets viewers see it from all sides.
The “Taos exhibition” for the Encanto collection will use both formats. This shows how the choice of format affects the story. A shadow box feels intimate and personal, while a vitrine shows value and invites careful viewing.
This choice is linked to the principles of juxtaposition in art. The box or case adds another layer of contrast to the objects inside.
| Format | Best For | Viewer Experience | Practical Considerations |
|---|---|---|---|
| Shadow Box | Intimate narratives, fragile paper elements, creating a sense of memory or theater. | Focused, personal, invites close inspection of a single scene. | Can be hung like a picture; depth allows for layered object placement. |
| Vitrine (Display Case) | Delicate 3D assemblages, valuable materials, museum or gallery settings. | Ceremonial, encourages walking around the piece, highlights object as artifact. | Requires secure pedestal or base; lighting must avoid glass glare. |
| Open Shelf or Plinth | Robust combines, interactive pieces, works meant to be seen from all angles. | Direct, tactile (though don’t touch!), integrates with the room’s space. | Dusting and stability are primary concerns; requires more secure mounting. |
Documentation: photography and condition notes
Without proper documentation, even the most groundbreaking assemblage piece risks being misunderstood or lost to time. Creating a clear record is a professional necessity. It supports your portfolio, enables sales, secures insurance, and builds a valuable personal archive.
Think of documentation as an extension of your creative process. Many artists, like the one cited in our source who photographed “daily object challenge” experiments with a phone camera, find it integral. This in-process recording captures the evolution of ideas.
High-quality photography is your first line of documentation. It freezes the artwork’s physical presence. Follow these core guidelines to capture texture and dimension effectively:
- Lighting: Use diffused, natural light or softbox lamps to avoid harsh shadows. Side lighting can accentuate texture.
- Background: Employ a neutral, solid-color backdrop. White, gray, or black works best to keep focus on the work.
- Angles: Shoot from multiple viewpoints. Include a straight-on front shot, detail shots of intricacies, and an angled shot to show depth.
Alongside images, detailed condition notes create a textual blueprint of your artwork. This written record is critical for future handling, conservation, and historical accuracy.
Your condition report should include several key elements. First, list all materials and their specific locations on the piece. Note the techniques used, like drilling or epoxy bonding. Lastly, flag any fragile or unstable elements that require special care.
This disciplined approach has profound long-term value. For pioneering artists like Meret Oppenheim, meticulous documentation has been vital for art historical study. It allows scholars and conservators to understand original intent and material choices decades later.
Start this practice with your next piece. Consistent documentation transforms your studio practice from casual creation to professional artistry. It ensures your work’s story is preserved, exactly as you intended it.
Conservation basics for mixed media
The real test of a mixed-media sculpture is how well it lasts over time. Like old antique trunks, your art tells a story of materials and history. To keep that story alive, you must think like a conservator from the start.
Different materials age differently. Metal can rust, wood can warp, and fabric can become brittle. Paper can turn yellow. When mixed, these changes can happen faster. A rusty bolt can stain fabric, and acidic wood can weaken paper.
You can’t stop time, but you can control the environment. Three main factors help in preventive care.
Light, like UV rays, fades colors and weakens materials. Keep your work away from direct sunlight. Humidity affects materials too. Too much moisture causes mold and rust, while too little leads to cracking. Aim for a stable humidity of about 50%. Temperature changes also cause stress. Keep your room cool and stable.
Your choice of materials is key. The adhesives you pick are the hidden backbone of your piece. A bad adhesive can fail, turn yellow, or damage materials. This can cause big problems.
Choosing the right adhesive is a big decision. Use archival-quality adhesives for lasting results. They are pH-neutral, flexible, and some can be reversed for repairs.
This table shows good options for mixed media projects.
| Adhesive Type | Best For | Long-Term Stability | Key Consideration |
|---|---|---|---|
| PVA (White Glue) | Porous materials (paper, wood, fabric) | Moderate. Can become brittle and yellow over decades. | Use acid-free, archival PVA for important work. |
| Epoxy Resin | Non-porous bonds (metal, glass, ceramic) | High. Creates a very strong, durable bond. | Not reversible. Can discolor if exposed to high UV light. |
| pH-Neutral Adhesive Stick | Light paper collage, temporary positioning | Low to Moderate. Not for structural bonds. | Excellent for avoiding acid damage in paper-based layers. |
| Conservation-Grade Wheat Paste | Paper, book arts, delicate fabrics | High when made correctly. Remains flexible and reversible. | Requires preparation but is a traditional, trusted choice. |
| Acrylic Medium (Matte) | Collage, sealing, bonding similar porous surfaces | High. Flexible and resistant to yellowing. | Doubles as a sealant and final varnish in many cases. |
The aim is not to make a fragile piece that’s locked away. It’s to make your art strong from the start. By choosing stable materials and archival adhesives, and considering where to display it, you help your art last. You become the first and most important caretaker of your artwork’s future.
Further resources and collection highlights
Your journey into object art doesn’t stop here. This section is your starting point for more exploration. Learning from the masters and finding quality materials is key.
Look for books on Surrealist object history and modern assemblage. Check out museums with great collections of mixed-media art. The National Archaeological Museum in Athens teaches us about presenting artifacts.
Artists like Robert Rauschenberg and Joseph Cornell turned everyday items into art. Their shadow boxes show us how to arrange objects beautifully.
For your own projects, look for specialized suppliers. They offer archival adhesives, paints, and structural armatures. These frameworks are vital for complex pieces.
Online museum archives let you see famous assemblages up close. Study their construction details. Use these resources to inspire your own work.
Visit local galleries or sculpture parks. Apply what you’ve learned about drilling, soft sculpture, and labeling. Start creating your own world of objects.